Step 01 · Prepare a Server Entry
Add Server: Add a Server or Import a Subscription
First, check what you have: a complete subscription link, or the protocol, address, port, and authentication details for a single server. The two options may be listed near each other, but they use different workflows. A subscription retrieves and manages a group of entries; a single server must be entered field by field for its protocol. Don’t use the domain in a subscription URL as the server Host.
Have a Subscription Link? Select Subscribe
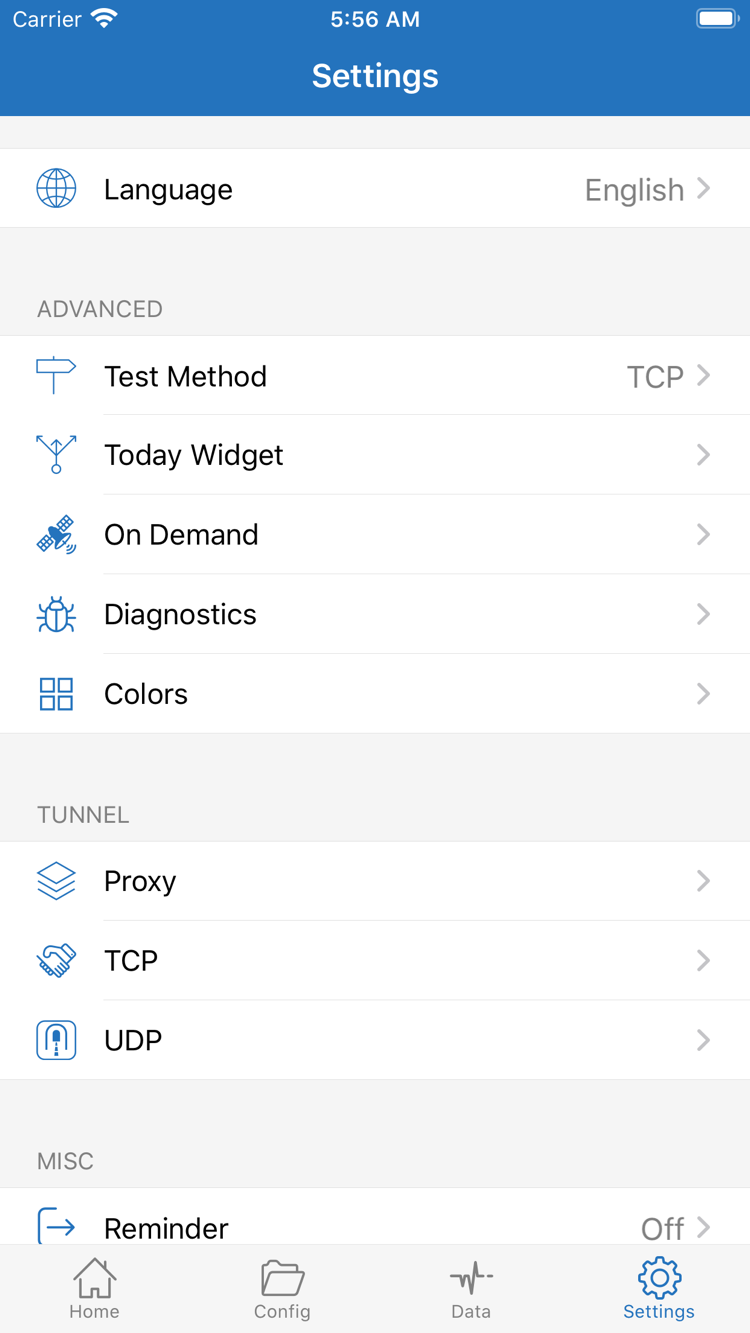
Open Home in Shadowrocket, find Add Server under SERVER, and open it. To use an existing subscription, select Subscribe under Type and paste the complete link into the URL field. Check for spaces, line breaks, or quotation marks added when copying. Don’t remove anything after the question mark; it may be needed to authorize access to the subscription. Add a note you’ll recognize, save, and wait for the import to finish.
Return to Home and check that the list contains the imported group or server entries, not just an empty subscription record. The current network must be able to reach the subscription URL during import. If the request fails, first check whether the link is still valid, then check your network. Repeatedly refreshing won’t fix expired credentials or replace checking the link.
Have Server Details? Check Type First
If you have details for a single server, select the correct Type in Add Server, then enter the Host, Port, and required authentication fields as provided. Password and Method in the screenshot apply to particular protocol fields; not every type uses the same parameters. Match the type—such as Shadowsocks, VMess, VLESS, or Trojan—to the server configuration. Similar names don’t make types interchangeable.
Host is generally the server address or domain. If your details provide a transport path, TLS name, or other extended fields separately, enter them in the corresponding fields rather than adding them to Host. You can also scan a QR code using Scan QR Code, but check the Type and key fields afterward. Import from Cloud JSON is for a specific input format; don’t use it to open arbitrary subscription links.
After saving, return to Home and confirm that the entry is there, then select the server you plan to use. This completes the import only; it doesn’t confirm that the connection works. If the entries change after a subscription update, check which one is selected before continuing. Subscription links and QR codes may contain credentials—don’t include them in public screenshots or posts.
Step 02 · Decide How Traffic Should Be Handled
Global Routing: Choose a Routing Mode
After saving the server entry, return to Home and open Global Routing. This setting determines how requests are handled, not which server protocol to use. The three modes are Config, Proxy, and Direct. Check the current selection before connecting to avoid mistaking an unexpected routing mode for a server problem.
Config: Apply Rules from the Active Configuration
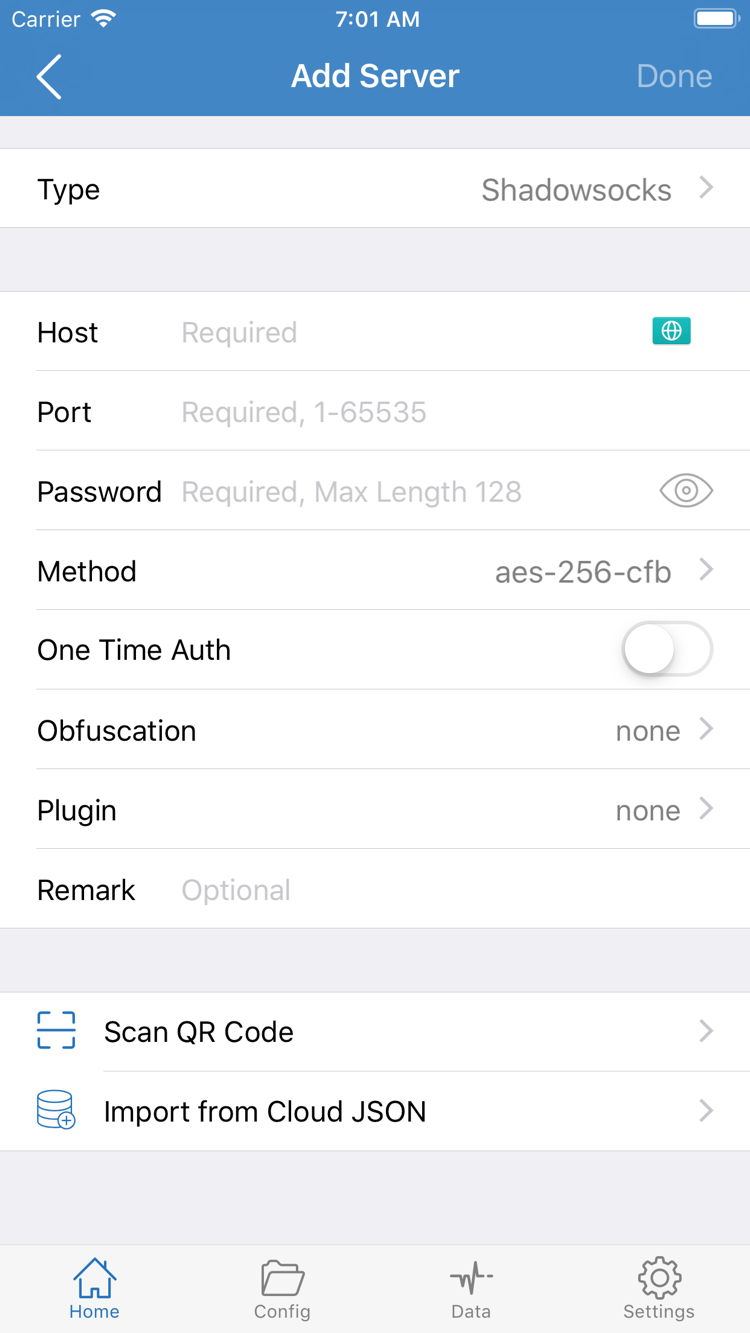
In Config mode, requests are handled according to the rules in the active configuration. Open Config and check which configuration file is actually in use—not just whether a file appears in the list. Its contents may include sections such as General, Rule, Hosts, and URL Rewrite. The screenshot shows where to find them; you don’t need to edit every section for your first connection.
The order of rules in Rule affects the outcome. Once an earlier rule matches, later rules usually aren’t considered for that request. FINAL handles requests that weren’t matched earlier. DIRECT means connect directly; REJECT means deny the request. Rules that point to a proxy or policy group also need a valid target. Seeing PROXY doesn’t mean the app will automatically fill in a server or policy group.
If you already have a configuration for a specific purpose, keep it intact and check that it’s active and its policies have matching entries. Don’t change DNS, Rule, and URL Rewrite all at once when connecting for the first time; if something goes wrong, it’ll be hard to tell which change caused it. A subscription and a configuration file are also different: the former can update server entries, while the latter mainly determines how requests are handled.
Proxy and Direct: Compare Routing Behavior
Proxy sends requests normally handled by this mode through the selected proxy. It’s useful for a quick check of whether the server itself works. It doesn’t guarantee that every system request goes through the proxy; system-exempt traffic and related settings can affect the route. If access works in Proxy but not in Config, check the configuration rules and policy mappings before re-entering server details.
Direct connects the relevant requests without using the selected proxy server. It can help you compare direct access on your current network, but switching to Direct doesn’t turn off the connection switch at the top of Home. To disconnect, return to Home, turn off the switch, and check the status; don’t just change Global Routing.
For the first test, stick with one mode, note your selection, and then connect. For a closer look at rules, see the Technical Reference. For help with common mode-selection issues, see Frequently Asked Questions. This guide asks you to know what you selected and why, not to write a complete set of rules all at once.
Step 03 · Establish the System Connection
Home: Turn On the Connection and Approve the Request
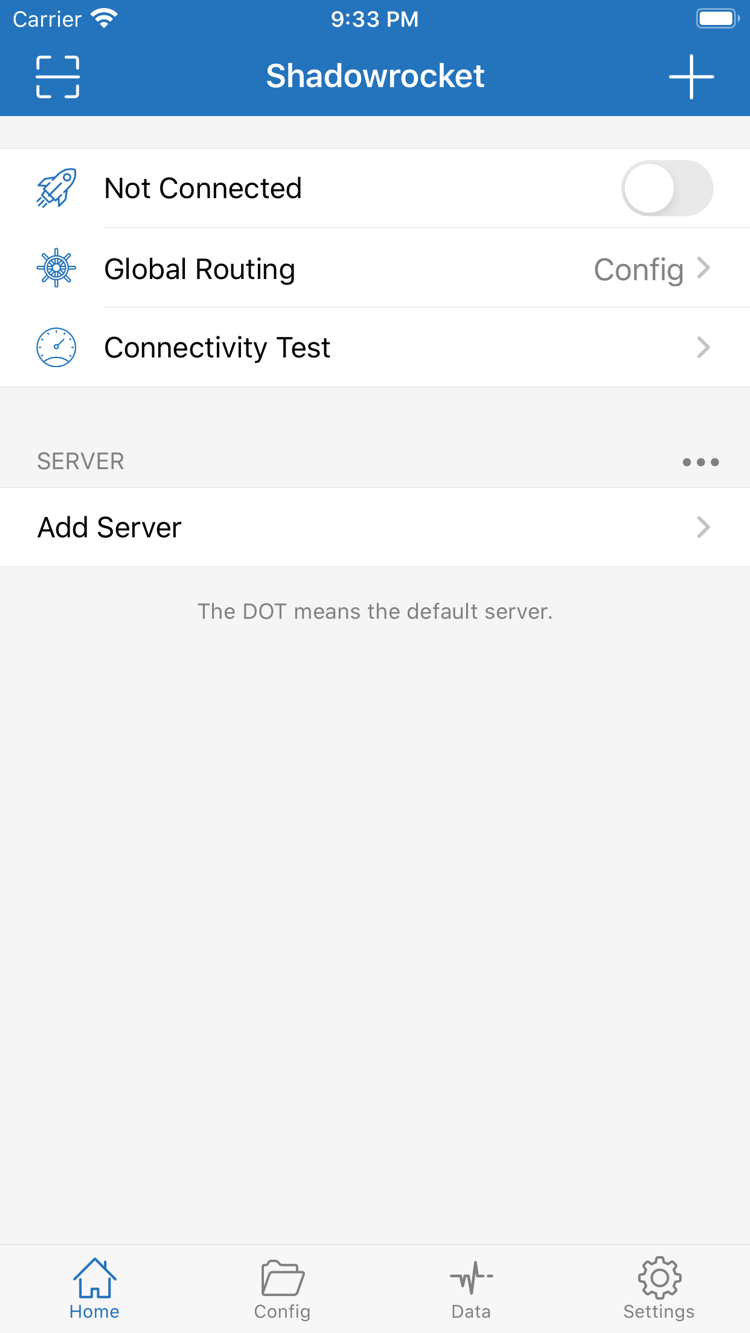
Return to Home. First, check that the server you plan to use is selected under SERVER, then check the mode shown in Global Routing. Selecting a server, choosing a mode, and turning on the connection are separate actions: a server appearing in the list doesn’t mean it’s selected, and selecting one doesn’t mean the system connection is on.
Turn on the connection switch at the top of Home. The first time you connect, the system may ask to let Shadowrocket add a VPN configuration. Read the prompt, confirm the request was initiated by Shadowrocket, and follow the system steps to approve it and complete device authentication. This authorization creates a system network configuration; it doesn’t replace subscription authentication or verify the server details.
After responding to the system prompt, return to Home. Check whether the status at the top changes from Not Connected to a connected state and whether the switch stays on. The system status area may show different connection indicators depending on the device and screen. Check both the app status and actual access rather than relying only on a status-bar icon.
If you previously denied authorization, return to the app and try connecting again, then follow the system prompt as it appears. A managed device may restrict adding VPN configurations; changing the server password won’t remove that restriction. First check whether the device allows the request, then continue troubleshooting the in-app settings.
If the connection switch turns off immediately after you turn it on, note the status change and any prompt first, then distinguish an authorization issue from a server connection issue. Don’t repeatedly switch between multiple entries before recording what happened. Keep the current server and mode, retry once, check whether the error is the same, and then continue to the troubleshooting steps below.
Follow the same steps on iPad; the layout may vary with window size. As long as you can identify Home, SERVER, Global Routing, and the connection switch at the top, you don’t need to change display settings to match the screenshots. Keep the connection on and continue by checking Connectivity Test and real destinations.
Step 04 · Check Status, Test Results, and Real-World Access
Connectivity Test: Check Whether the Connection Works
Keep the server and mode you just selected, then run Connectivity Test from Home. Wait for the test to finish before interpreting the result. A successful test only shows that the test method could reach its target under the conditions at that moment; it doesn’t guarantee that every website, protocol, or ongoing transfer will work. If the test fails, consider the test method too—one result alone isn’t a reason to delete the entire subscription.
Next, open a destination you normally need and wait for it to load fully, rather than relying on content already displayed on screen. Browsers and apps may cache content, so an old page appearing doesn’t prove that a new request succeeded. Reload the page or open content you haven’t visited yet, and check whether images, text, and follow-up requests all complete.
In Config mode, check at least one destination expected to use the proxy and one expected to connect directly. If either behaves unexpectedly, open Data and review the request or traffic records available in the current interface. Any rule, policy, or error details in the records can help show whether a request took the expected route. An increase in total traffic only shows that data was transferred; it doesn’t prove a particular destination matched a specific rule.
| What You See | Check First | Next Step |
|---|---|---|
| Connection is on, test succeeds, and the destination loads normally | Whether the server, mode, and configuration match what you intended | Keep these settings as a baseline for comparison |
| Test succeeds, but some destinations fail to load | Rules for the destination, DNS, and app cache | Change one condition and test the same destination again |
| Accessible in Proxy, but not as expected in Config | The active configuration, Rule order, and policy targets | Check Config before considering rebuilding the server entry |
| Test fails, but the real destination is accessible | Test Method and whether the test target is reachable | Use actual access records to investigate; don’t rely only on the test result |
To compare Wi-Fi and cellular data, note the current results first, then switch networks and repeat the same test with the same destination, server, and mode. Don’t update the subscription or change configurations at the same time; otherwise, you won’t have a useful comparison. Tests may use network data, so check your data plan before testing over cellular.
Once you’ve confirmed a working set of settings, restore any rules or On Demand conditions you need one at a time. After each change, test access again. This lets you return to the last verified setup if something goes wrong, without repeating the setup from scratch. If you’re unsure about a record field, check the Glossary.
Step 05 · Troubleshoot Based on Where the Issue Occurs
Settings: Troubleshoot Common Issues
First identify where the issue occurs: the subscription wasn’t imported, the switch won’t stay on, or the connection is on but a destination won’t load. Each points to different possible causes. Return to the most recently completed step and confirm it still meets its completion criteria before moving on. This is more effective than resetting everything at once.
Import Failed: Check the Input and Subscription Response
If a subscription update fails, check the complete URL, your current network, and whether the subscription is still valid. If the URL responds but no entries are imported, check whether the response uses a subscription format supported by the app. A login page, error page, or informational page for viewing in a browser isn’t server configuration data. If saving a single server fails, check the required fields for its Type and make sure Port is correct.
If the servers in an existing subscription have changed, check which entry is selected again after updating. Check subscription updates and Config file updates separately; a successful update of one doesn’t show that the other has synced. To confirm whether your details are valid, contact the provider of your existing service and share only the necessary error description.
Connection Failed: Check Authorization, Credentials, and Device Time
If the switch won’t turn on, first check whether system authorization is complete and whether the device has management restrictions. If the switch turns on but the server doesn’t work, check Host, Port, authentication details, transport settings, and TLS fields. A mismatched protocol-specific name or path can also prevent the connection. Don’t hide a field error by disabling certificate verification without good reason.
For certificate or authentication errors involving time checks, make sure the device date and time are correct. If another network configuration is enabled at the same time, first confirm which one is active, then compare the results. Keep network conditions as consistent as possible during initial troubleshooting so connection changes and parameter changes don’t get mixed together.
Access Failed: Check Test Method and On Demand
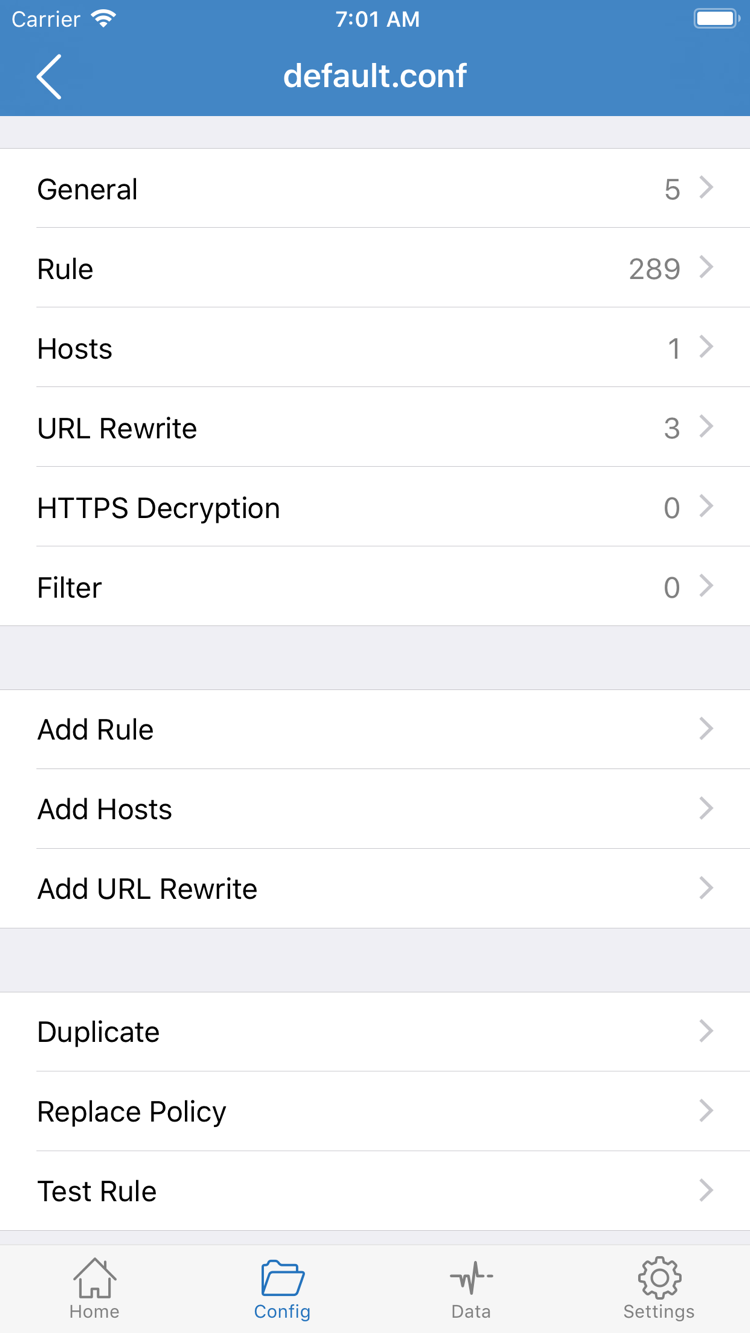
In Settings, find Test Method and check the current method. Each method checks a different target, so latency values aren’t a direct measure of webpage loading speed and shouldn’t be compared mechanically across methods. If only the test fails but the real destination works, check the test conditions first. If the destination also fails, review the rules and server route.
If the connection comes back on after you manually turn it off, or its status changes after switching Wi-Fi networks, check whether On Demand is enabled and review its trigger conditions. While testing the first connection, you can temporarily disable automatic triggers and verify the manual steps from Home. Once the basics work, add any required conditions one at a time. Don’t assume automatic reconnection means the switch is broken and repeatedly change server settings.
If you still can’t find the cause, open Diagnostics in Settings and keep the relevant details for the time the issue occurred. Before sharing, redact subscription links, authentication fields, QR codes, and information that could identify your network. Include the selected mode, network type, failed step, and any single-condition comparisons you’ve tried; there’s no need to share the entire configuration.